

A version control is just a way to keep track of changes made to files throughout time. It allows you to return to previous versions later. I bet you are already using one without even knowing it!
When you copy a file or a script before modifying it, you’re using version control. However, your manual version control may become hard to deal with at some point. That’s why it’s worth investing time early on in a project and use a more systematic version control.
As pointed out in this stackover flow post excerpt (referenced on RStudio webpage) , a version control system makes our life easier in several cases, particularly if you have ever :
- Made modifications to code, realized it was not a good idea and wanted to go back to the previous version?
- Lost code because something went wrong and you forgot to save your work?
- Wanted to see the difference between two (or more) versions of your code?
- Wanted to prove that a particular change broke or fixed a piece of code?
- Wanted to review the history of some code?
- Wanted to share your code, or let other people work on your code?
Luckily, two open-source version control are supported within RStudio :
I won’t reveal which one I prefer, I’ll just say that Git was supported first in RStudio. And when creating a new project, it’s the only option you can choose in version 0.98. So I’ll focus on it.
Version control features in RStudio are only accessible within an RStudio project. So the first step is to set up an RStudio Project.
After that, the features are located in the top right panel. In this panel, you’ll see the different files in your project and you’ll be able to tell Git which one to track (in a new project) or see which one are tracked (if in an existing project).
In the initial commit (new project), you’ll selected the files to be staged (or tracked). Those files will have a little green “A” (added) beside their names. You then click on commit.
To proceed with the commit, a message describing your modifications is required. This helps to remember what you’ve changed and for collaborators to follow your modifications if you decide to share your project.
Once the commit is done, Git will give you feedback about what just happened. If something went wrong, you’ll know.

First commit was successful.
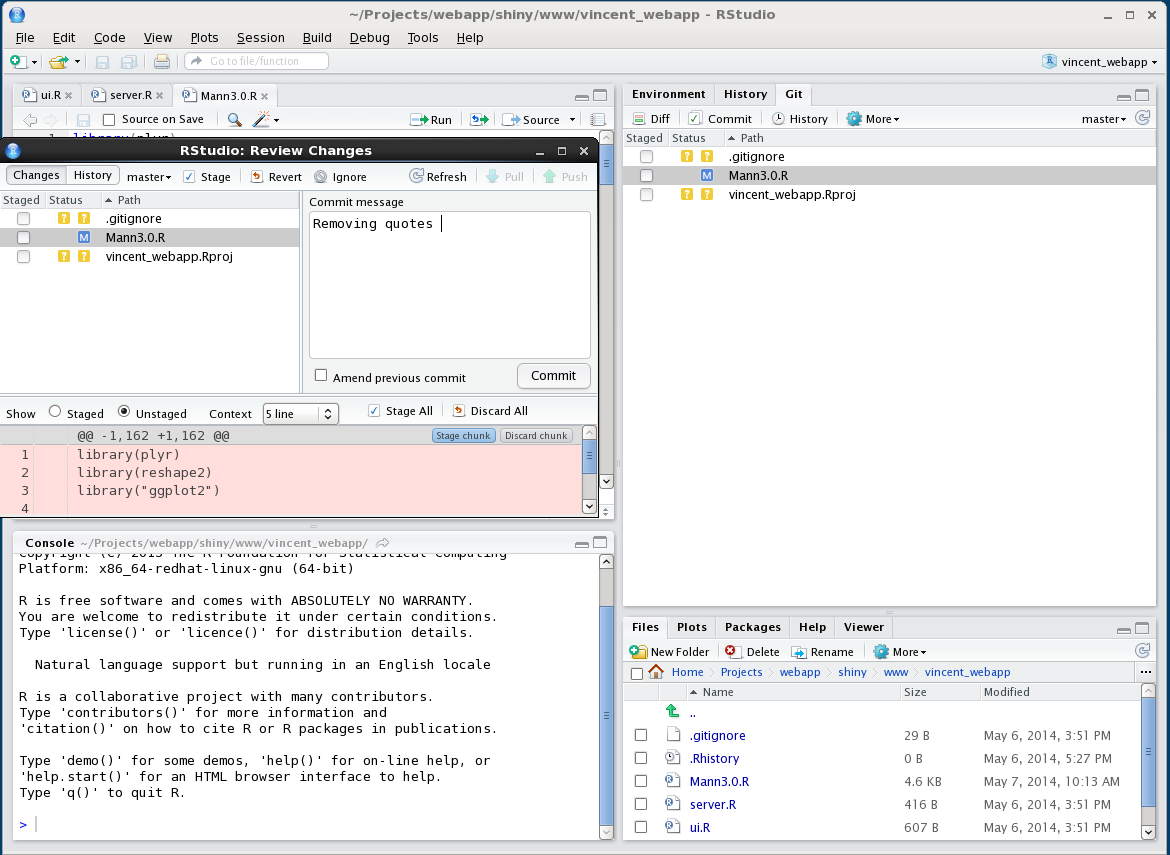
Just before the commiting, you need to describe the modifications you have made

Leave A Comment